ການ Navigate route
ດ້ວຍການໃຊ້ go router ເຮົາມີ 2 option ຫຼັກໆທີ່ຈະສາມາດໃຊ້ navigate ໄດ້
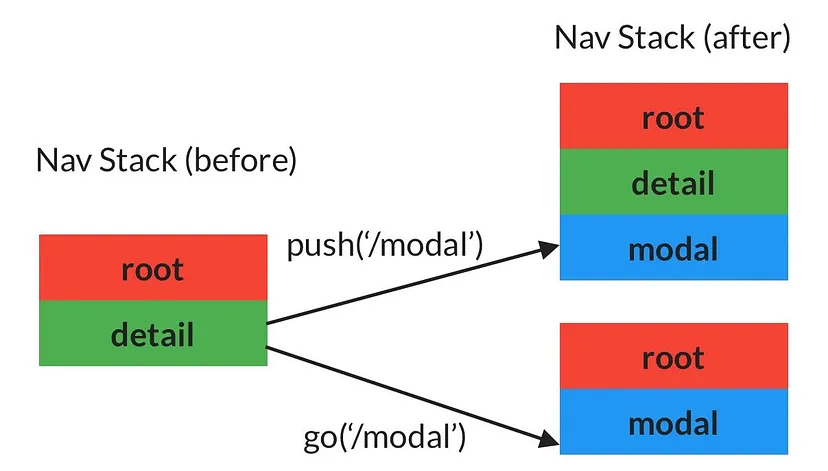
ການ navigate ດ້ວຍ context.go ຈະເປັນການ navigate ໂດຍການເອົາ route ທີ່ຈະ navigate ເຂົ້າມາແທນທີ່ route ປັດຈຸບັນໃນ stack ເລີຍ
ການ navigate ດ້ວຍ context.push ຈະເປັນການ navigate ແບບເພີ່ມ route ປາຍທາງເຂົ້າມາໃນ stack
Named route ຫຼື ການຕັ້ງຊື່ route ໃດໜຶ່ງ
ການເຮັດ named route ກໍຄືການຕັ້ງຊື່ໃຫ້ route ໃດໜຶ່ງໄວ້ເຜື່ອກໍລະນີ້ທີ່ເຮົາຕ້ອງການຈະ navigate ໂດຍການເອີ້ນຊື່ ແທນການເອີ້ນ full path
ຕົວຢ່າງການຕັ້ງ named route:
...
GoRoute(
  path: ProfileEditScreen.path,
  /// named route set to `profile-edit`
  name: 'profile-edit',
  builder: (context, state) => const ProfileEditScreen(),
)
...
ການ Navigate ດ້ວຍ Named route ແລະ ດ້ວຍ path
/// navigate with named
onEdit: () => context.pushNamed('profile-edit'),

/// navigate with full-path
onEdit: () => context.push('/profile/edit'),
ການປະກາດ sub-route
GoRoute(
path: ProfileScreen.path,
builder: (context, state) => const ProfileScreen(),
routes: [
GoRoute(
path: ProfileEditScreen.path,
name: 'profile-edit',
builder: (context, state) => const ProfileEditScreen(),
),
...
],
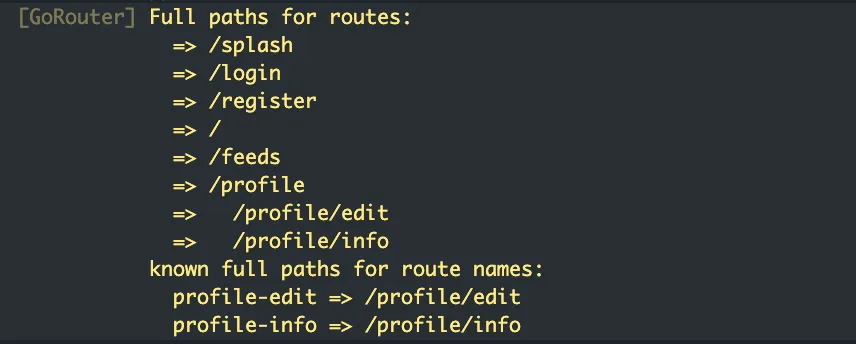
),ໃນ go router ຈະມີ routes ໄວ້ສຳລັບປະກາດ sub-route List ໄດ້
source: ຈະ open ໃນ part 3
next: Flutter riverpod + Go Router [part 3] — ການສົ່ງ arguments ລະຫວ່າງ route
ຂຽນໂດຍ: Noy Sengxayya